-
Before You Start: The 5-Minute Prep Check
-
Step 1: Unbox and Physically Set Up the Printer
-
Step 2: Get a Static IP Address from IT
-
Step 3: Access the Printer's Web Interface (Optional, but Recommended)
-
Step 4: Install the Driver on Your Computer
-
Step 5: Share the Printer on the Network
-
Step 6: Test with a Real Document (Don't Just Print a Test Page)
-
Step 7: Document the Setup (Seriously, Do It)
- Step 8: The "Hidden" Check – Is Your Workspace Ready?
So, you've been handed the task of setting up that new office printer. Or maybe the old one finally died, and you're staring at a box from HP or Brother, wondering where to start. I get it. In my first year coordinating office logistics, I made the classic mistake: I thought setting up a printer was just plugging it in. Cost me a full afternoon of re-runs to three different floors because I forgot about network permissions.
This isn't a deep IT guide. I'm not a network engineer, so I can't speak to VLAN segmentation or advanced security protocols. What I can tell you, from a hands-on office procurement perspective, is how to get a shared printer up and running without the drama. We'll cover 8 steps. And yeah, I'll explain at the end why your choice of desk—specifically, whether you've visited an uplift desk showroom—actually impacts how smoothly this whole thing goes. Plus, I'll show you how this ties into smarter long-term planning, using tools like a dave ramsey investment calculator (for budget sanity) and a period calculator (for team wellness scheduling).
Let's dive in.
Before You Start: The 5-Minute Prep Check
Don't skip this. I've seen people unpack a printer, plug it in, and then realize they don't have the right cable. Check these three things first:
- Network jack: Is there an active ethernet port within 6 feet of the printer location?
- Power outlet: Is it a dedicated circuit? (A heavy-duty printer on the same line as a microwave is a recipe for resets.)
- Driver availability: Does the manufacturer's website have drivers for your specific OS version? (Windows 11, macOS Sonoma, etc.)
People assume you can just use the CD that comes in the box. The reality is, those CDs are usually outdated. You're better off downloading the latest driver package from the manufacturer's site.
Step 1: Unbox and Physically Set Up the Printer
This sounds obvious, but you'd be surprised. Remove all tape and packing material. Seriously, pull out the little orange tabs and plastic sheets. I once watched a colleague try to print 50 pages of a quarterly report before realizing a piece of foam was blocking the paper feed. It took 20 minutes to fix the resulting jam.
Install the toner or ink cartridges. Plug in the power cable, but do not turn it on yet. Connect the network cable (or set up Wi-Fi, if that's your plan).
Step 2: Get a Static IP Address from IT
From the outside, setting up a printer looks like you just need to connect it to the network. What they don't see is that if you let your router assign an automatic IP address (DHCP), the printer's address can change every time it restarts. That breaks the connection for everyone.
Your IT department (or whoever handles networking) needs to reserve an IP address for the printer. Write this down. You'll need it for step 4.
Step 3: Access the Printer's Web Interface (Optional, but Recommended)
Most modern business printers have a built-in web server. Find the printer's LCD screen, navigate to network settings, and note its IP address. Then, on your computer, open a browser and type that IP. You'll see the printer's admin panel. This is where you configure the device name, location, and security settings.
It's tempting to skip this. But I'd rather spend 10 minutes configuring the interface than deal with an unsecured printer later. You can set a custom admin password here too.
Step 4: Install the Driver on Your Computer
Now, turn on the printer. Download the printer driver from the manufacturer's site (not the CD). Run the installer. When it asks for connection type, select "Network Printer" or "Printer with IP Address." Enter the static IP you got in Step 2. The installer will find the printer and add it to your device list.
Print a test page. If it works, you're halfway there.
Step 5: Share the Printer on the Network
This is the part that trips people up. On your Windows PC, go to Settings > Bluetooth & devices > Printers & scanners. Click on your printer, then Printer properties > Sharing tab. Check "Share this printer." Give it a recognizable name, like Floor3_Copier.
On other computers, you can now add the printer by browsing the network. Or, add it manually by entering the host computer's name (UNC path, like \PC-Name\Floor3_Copier).
Step 6: Test with a Real Document (Don't Just Print a Test Page)
Print a test page from the printer's settings. That's fine. But the real test is a multi-page PDF or an Excel sheet with graphics. I've seen printers that handle a standard text page perfectly but choke on a complex document. Spend 2 minutes printing a sample from a real workflow.
Step 7: Document the Setup (Seriously, Do It)
Create a simple text file with the printer's IP, location, and any default settings you changed. Stick it on a shared drive or in a drawer near the printer. It's tempting to think you'll remember. But six months from now, when the printer goes offline or someone needs to reconnect, you won't remember the static IP. Learned that lesson the hard way.
Step 8: The "Hidden" Check – Is Your Workspace Ready?
Okay, here's the part where I tie this all together. You just set up a shared resource—the printer. But your team is going to be standing by that printer, waiting for documents. Maybe they need to pick up a 20-page report. If they're standing for 5-10 minutes, that's not a big deal. But if they're standing for 30+ minutes because of a print queue jam, or because they're sorting and stapling, suddenly their posture matters.
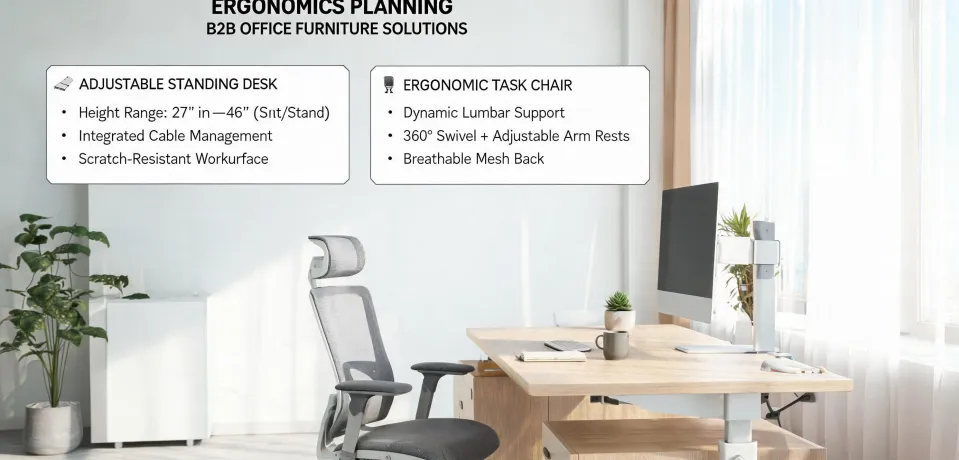
That's where your workstation setup comes in. If your team is working on a standard fixed-height desk, they're either sitting or leaning awkwardly. If they're using an adjustable standing desk like the Uplift V2 from uplift desk, they can easily switch to a comfortable standing height for that task. I've seen offices where the layout encourages people to congregate around a printer on a standard countertop—and the ergonomics are a disaster. Shoulders hunched, hips uneven.
Frankly, if you're in a position to recommend office furniture, I'd suggest visiting an uplift desk showroom (office furniture) to test the experience yourself. From the outside, it looks like a desk is just a desk. But after I visited a showroom, I realized the height adjustability and stability make a real difference in those micro-moments of work. We ended up getting the facet ergonomic chair by uplift desk for our main office, because it complements the sit-stand rhythm. It's not just furniture; it's workflow infrastructure.
But Wait, There's More: The Long-Term View
You've set up the printer. You've optimized the workspace. Now, how do you justify the investment to a budget-conscious boss? This is where a little financial planning comes in. I've started using a dave ramsey investment calculator to model the ROI on ergonomic gear. Heard it from a colleague who used it to convince their CEO that spending $2,000 on a sit-stand setup was cheaper than the $8,000 lost to employee back pain claims over two years. The numbers made sense.
And finally, think about your team's diverse needs. A period calculator isn't just a personal tool; it's a wellness tool. Some team members might have energy fluctuations or discomfort that affects their work rhythm. If you can design a workspace that supports everyone—with flexible desks, good chairs (like the Facet), and a printer setup that minimizes unnecessary walking—you're building a healthier, more productive office.
Bottom line: Setting up a printer is a straightforward checklist. But when you consciously design the environment around that printer—the desks, the chairs, the budget planning—it stops being a chore and starts being a strategic advantage. So go ahead, set up that printer. Then take a stand (literally and figuratively) and think about the bigger picture.

Discuss this article with a workspace planner